
Introduction: Why Build Your Own PC in 2025?
From a financial perspective, assembling your own PC can often lead to significant savings. While the initial component costs might seem substantial, you’re paying for the raw hardware without the additional markups for assembly, branding, and pre-installed software bloatware that often accompany OEM (Original Equipment Manufacturer) systems. By carefully selecting parts during sales or bundles, you can achieve a much higher performance-to-price ratio. Furthermore, understanding the individual components means you can strategically upgrade parts down the line, extending the lifespan of your system and avoiding the need to replace the entire machine every few years. This modularity is a core advantage that makes custom builds an intelligent long-term investment.
Planning Your Build: Defining Your Needs and Budget
The foundation of any successful PC build is meticulous planning. Before you even consider specific components, it’s crucial to define the primary purpose of your new machine and establish a realistic budget. These two factors will guide every subsequent decision, ensuring you build a system that meets your expectations without unnecessary expenditure. In 2025, with a vast array of hardware options, clarity on your objectives is more important than ever.
First, let’s identify the core purpose. Are you building a dedicated gaming rig to play the latest titles at ultra settings and high refresh rates? Is it a powerful workstation for demanding professional applications like video editing, 3D rendering, or CAD? Perhaps you need a compact, quiet system for a home office, or a versatile machine for general productivity, web browsing, and casual entertainment. Each use case dictates different hardware priorities. For instance, a gaming PC will prioritize a high-end GPU and a capable CPU, while a content creation workstation might lean towards a CPU with many cores, ample RAM, and fast, large-capacity storage. A general-use PC can often leverage integrated graphics and more modest specifications, saving considerable cost. Be honest about your primary needs, as overspending on components you won’t fully utilize is a common pitfall.
Once your purpose is clear, setting a budget is the next critical step. This isn’t just about a total number; it’s about intelligent allocation. Components like the CPU, GPU, and Motherboard often consume the largest portions of the budget. In 2025, budget allocation might see a slight shift towards faster NVMe SSDs utilizing PCIe Gen 5 and potentially higher-wattage PSUs to accommodate increasingly powerful graphics cards. A general guideline for a gaming PC might allocate 35-45% to the GPU, 20-25% to the CPU, 10-15% to the Motherboard, 5-10% to RAM, 5-10% to storage, and the remainder for the PSU, Case, and Cooler. These percentages can vary based on market conditions and specific component pricing.
Future-proofing is another vital consideration in 2025. While no PC can be truly future-proof indefinitely, you can make intelligent choices to extend its relevant lifespan. Opting for a Motherboard with support for the latest PCIe generation (PCIe Gen 5 is increasingly common for GPUs and NVMe SSDs) and DDR5 RAM will ensure compatibility with upcoming hardware. Choosing a PSU with sufficient headroom (e.g., an 850W or 1000W unit for a high-end system, even if current components only draw 600W) allows for future GPU upgrades without needing to replace the power supply. Similarly, selecting a Motherboard that supports a range of CPUs within the same socket can provide an upgrade path.
Compatibility is paramount. The CPU you choose dictates the socket type on your Motherboard (e.g., LGA1700 for Intel, AM5 for AMD). The Motherboard then dictates the type of RAM (DDR4 or DDR5), the number of RAM slots, and the available PCIe lanes for your GPU and NVMe SSDs. Your Case must accommodate the Motherboard’s form factor (ATX, Micro-ATX, Mini-ITX) and have enough space for your chosen GPU, CPU cooler, and storage drives. Always consult the specifications of each component and use online compatibility checkers to avoid frustrating surprises during assembly. Researching components thoroughly, reading reviews, watching benchmarks, and comparing prices, is an indispensable part of this planning phase. Websites like PCPartPicker (PCPartPicker.com) are invaluable for checking compatibility and comparing prices across multiple retailers, simplifying the planning process significantly.
| Component | Approximate Budget % | Key Considerations |
|---|---|---|
| CPU | 18-22% | Core count, clock speed, integrated graphics (if no discrete GPU) |
| Motherboard | 10-12% | Socket, Chipset, RAM support (DDR5), PCIe Gen 5 support |
| RAM | 7-10% | Capacity (16GB-32GB+), speed (DDR5), latency |
| GPU | 35-45% | Performance tier, VRAM, brand (NVIDIA/AMD) |
| Storage (NVMe SSD) | 8-12% | Capacity (1TB-2TB+), speed (PCIe Gen 4/5) |
| PSU | 5-8% | Wattage, efficiency rating (80 Plus Gold), modularity |
| Case | 4-6% | Form factor, airflow, aesthetics, I/O ports |
| CPU Cooler | 3-5% | Air vs. AIO, cooling capacity, noise levels |
| Operating System | 0-10% | Windows, Linux (can be free) |
Component Deep Dive: Choosing Your Hardware
Selecting the right components is where your planning translates into tangible hardware choices. Each part plays a crucial role in the overall performance, stability, and longevity of your PC. In 2025, technological advancements mean there are more choices than ever, making informed decisions paramount.
The CPU (Central Processing Unit) is the “brain” of your computer, responsible for executing instructions and performing calculations. The main contenders are Intel and AMD. Intel typically offers strong single-core performance, advantageous for many gaming scenarios, while AMD often excels in multi-threaded workloads, making them a favorite for content creation and productivity. Key specifications to consider include core count, thread count, clock speed, and cache size. For gaming, a 6-8 core CPU with high boost clocks is often sufficient, while professionals might opt for 12-16+ cores. Pay attention to the socket type (LGA1700 for modern Intel, AM5 for modern AMD) as this dictates your Motherboard choice. Some CPUs also include integrated graphics (iGPU), which can be useful for troubleshooting or if you’re not planning a discrete GPU.
**Need help choosing?**
Check our detailed [Guide to Choosing the Best Gaming CPU] for 2025 recommendations across all budgets. Key specifications to consider include core count, thread count, clock speed, and cache size…
**Understanding CPU Fundamentals:**
– Learn more: [What is a CPU?]– Deep dive into CPU architecture and how it works
The Motherboard acts as the central hub, connecting all your components. Its chipset determines compatibility with specific CPUs, RAM types, and the number of available PCIe lanes and M.2 slots. For 2025, look for Motherboards that support DDR5 RAM and ideally PCIe Gen 5 for both the primary GPU slot and at least one M.2 NVMe SSD slot to ensure future compatibility and maximum speed. Consider the form factor (ATX is standard, Micro-ATX and Mini-ITX are for smaller builds), the number of RAM slots (four is typical for ATX), the available SATA ports for additional storage, and the variety of I/O ports on the rear panel (e.g., USB 3.2 Gen 2, USB-C, Ethernet, audio jacks, DisplayPort/HDMI for iGPU output). Features like integrated Wi-Fi 6E or Wi-Fi 7 and Bluetooth are also increasingly common and convenient.
**Motherboard Fundamentals:**
– [Understanding the Motherboard]
– Complete guide to motherboard anatomy – [How to Check Motherboard Compatibility]– Ensure all your parts work together
**Intel 14th Gen Builds:**
If you’re planning an Intel build, check our [Motherboard for Intel 14th Gen Processors] guide and [Top 5 Budget Motherboards for Intel 14th Gen Under $150]
**Premium Option:**
For high-end AMD builds, see the [ROG Crosshair X870E Hero] review. For 2025, look for Motherboards that support DDR5 RAM and ideally PCIe Gen 5 for both the primary GPU slot and at least one M.2 NVMe SSD slot…
**Hidden Features:**
Don’t miss [4 Hidden Features of Your Motherboard You’re Not Using]
RAM (Random Access Memory) is your system’s short-term memory, crucial for multitasking and application responsiveness. In 2025, DDR5 RAM is the standard for new builds, offering higher speeds and bandwidth compared to DDR4. Aim for at least 16GB for general use and gaming, with 32GB or even 64GB recommended for content creation and demanding workloads. Look for RAM with higher speeds (e.g., 6000MHz or more) and lower CAS Latency (CL) for optimal performance. Always install RAM in matched pairs (e.g., two 8GB sticks for 16GB) in the correct slots (consult your Motherboard manual) to enable dual-channel memory mode, which significantly boosts performance.
**Maximize your RAM performance:**
After installation, learn [How to Enable XMP Profile] to unlock your RAM’s full speed potential.
**Understanding Memory:**
Dive deeper into [Demystifying RAM: What is Random Access Memory?]and [What is Cache Memory: The Key to Faster Computing]
Always install RAM in matched pairs (e.g., two 8GB sticks for 16GB) in the correct slots (consult your Motherboard manual) to enable dual-channel memory mode, which significantly boosts performance.
The GPU (Graphics Processing Unit), often referred to as the graphics card, is arguably the most critical component for gaming and graphically intensive tasks. NVIDIA’s GeForce RTX series and AMD’s Radeon RX series are the primary options. Key specifications include the GPU model itself (e.g., RTX 4080 Super, RX 7900 XT), the amount of VRAM (Video RAM), and the CUDA cores (NVIDIA) or Stream Processors (AMD) which dictate raw processing power. More VRAM is beneficial for higher resolutions and texture settings. Your budget will largely dictate your GPU choice, as this is often the most expensive component.
**GPU Resources:**
- – [What is a GPU?]– Understanding graphics processing fundamentals
- – [What Is VRAM: Unlocking the Power of Graphics Memory]
– Why VRAM matters for gaming Key specifications include the GPU model itself (e.g., RTX 4080 Super, RX 7900 XT)…
**Budget GPU Options:**
- – [Is the AMD RX 6600 Still Worth Buying in 2025?]
- – [Best 9070 XT Graphics Card]– Top models compared
**Troubleshooting:**
If you encounter issues, see [Top Reasons Why Your Graphics Card is Not Working]
For storage, NVMe SSDs connected via PCIe are the undisputed champions for primary drives in 2025. They offer vastly superior speeds compared to traditional SATA SSDs and hard disk drives (HDDs). Prioritize an NVMe SSD (at least 1TB, preferably 2TB or more) for your operating system and frequently used applications and games. Look for PCIe Gen 4 or, if your Motherboard supports it, PCIe Gen 5 NVMe SSDs for the fastest possible load times. SATA SSDs can still be a cost-effective option for secondary storage of less-demanding games or applications, while HDDs remain viable for mass storage of media files where speed isn’t critical.
## Storage: The Foundation of Speed
For storage, NVMe SSDs connected via PCIe are the undisputed champions for primary drives in 2025. They offer vastly superior speeds compared to traditional SATA SSDs and hard disk drives (HDDs).
### Understanding Storage Technologies
Before choosing your storage, it’s crucial to understand the different types:
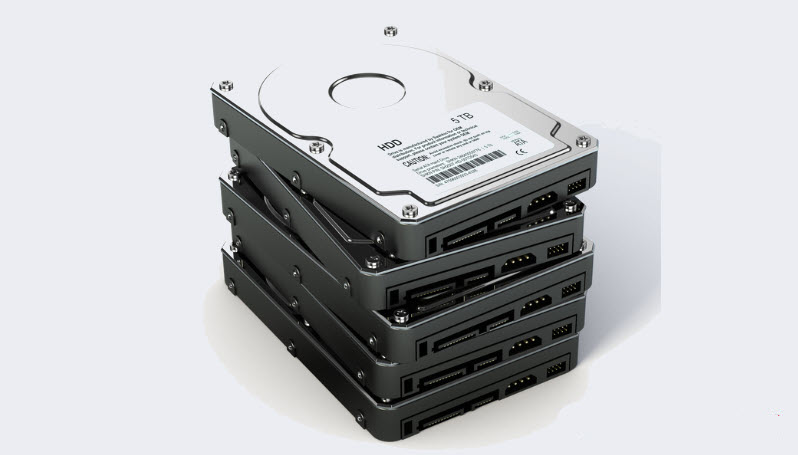
**Traditional Hard Drives:**
[Understanding Hard Disk Drives (HDDs)]- While slower, HDDs remain excellent for mass storage of large media files where speed isn’t critical.
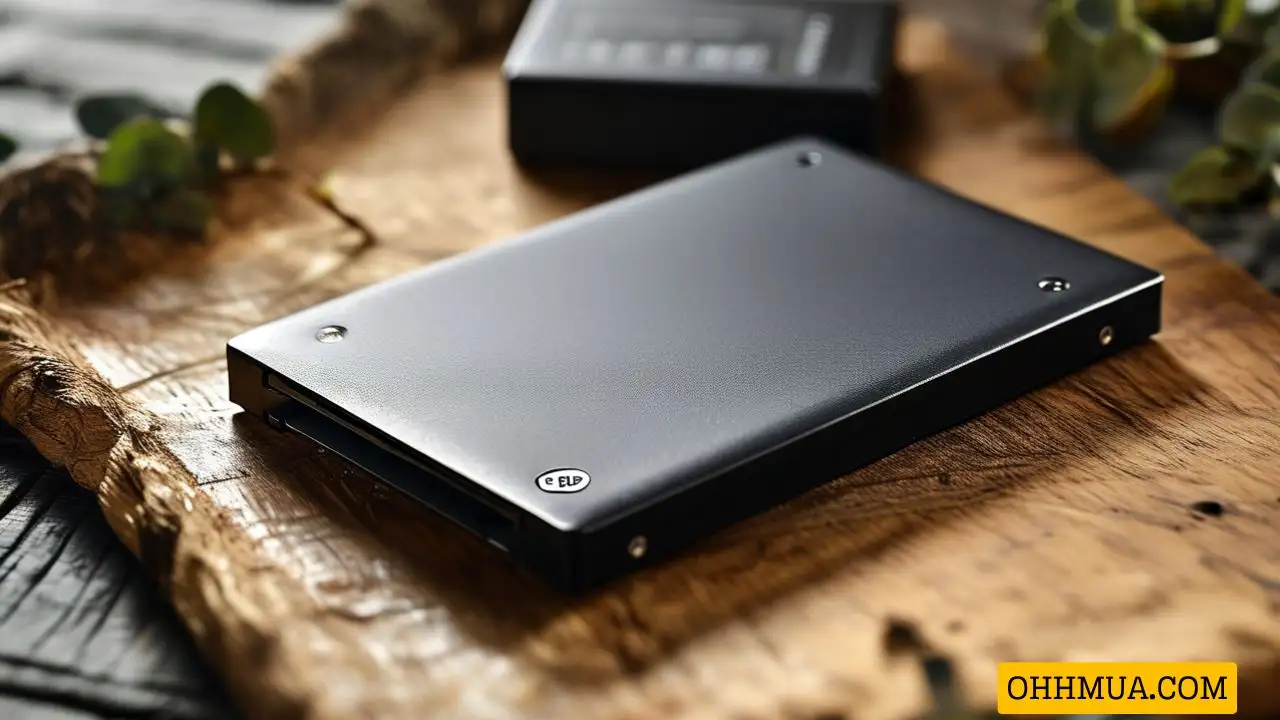
**Solid State Drives:**
[What is a Solid State Drive (SSD)?]- Learn why SSDs are the modern standard for boot drives and gaming.
**NVMe Technology:**
[What is NVMe?]- Discover why NVMe drives offer dramatically faster performance than SATA SSDs.
### Choosing Your Storage Configuration
**Primary Drive Recommendation:**
Prioritize an NVMe SSD (at least 1TB, preferably 2TB or more) for your operating system and frequently used applications and games. Look for PCIe Gen 4 or, if your Motherboard supports it, PCIe Gen 5 NVMe SSDs for the fastest possible load times.
**Not sure which to buy?** Read our comparison: [M.2 NVMe vs SATA SSD: Which One Should You Buy in 2025?]
**Performance Impact:**
Curious if an SSD actually improves gaming? Check [What is an SSD: Does an SSD Help You Game Faster?]
**Laptop Upgrades:**
Building a desktop taught you the basics? Apply that knowledge: [Best SSD Upgrades for Gaming Laptops in 2025]
### Storage Maintenance
**Keep your drives healthy:**
– [5 Signs Your SSD is About to Fail]- Don’t lose your data
– [6 Tips to Boost Your Hard Drive Performance]- Optimize your storage
The PSU (Power Supply Unit) provides power to all your components. It’s crucial not to skimp on this. Calculate your estimated wattage needs using online PSU calculators, then add a buffer of 150-200W for future upgrades and system stability. Look for an 80 Plus efficiency rating (Bronze, Gold, Platinum, or Titanium), with Gold being a good balance of efficiency and cost for most builds. Modular or semi-modular PSUs are highly recommended for easier cable management, as you only connect the cables you need.
**PSU Resources:**
– [Ultimate Guide to Power Supply Units]– Everything you need to know
– [How to Check Computer Power Supply]– Verify your PSU specifications
– [How Many Watts Does Your Computer Power Supply Need?]– Calculate your requirements Calculate your estimated wattage needs using online PSU calculators, then add a buffer of 150-200W for future upgrades and system stability.
**Warning Signs:**
Watch for [How to Tell if Your PSU is Failing]
Your Case houses all your components. Considerations include form factor (matching your Motherboard), airflow design, aesthetics, and available I/O ports on the front panel (USB-A, USB-C, audio jacks). Ensure it has enough clearance for your chosen GPU and CPU cooler. Good airflow is vital for thermal performance, so look for cases with mesh panels and ample fan mounting options.
**Case Recommendations:**
– [The Sama SV01: A Simple Yet Beautiful PC Case] Ensure it has enough clearance for your chosen GPU and CPU cooler. Good airflow is vital for thermal performance, so look for cases with mesh panels and ample fan mounting options.
Finally, CPU cooling is essential. Stock coolers often suffice for lower-end CPUs, but for mid-to-high-end processors, an aftermarket solution is highly recommended. Options include air coolers (large heatsinks with fans) or liquid coolers (AIO – All-In-One, or custom loops). Air coolers are generally more reliable and quieter for their price, while AIOs offer excellent performance in a compact package and often have aesthetic appeal with RGB lighting. Don’t forget high-quality thermal paste to ensure efficient heat transfer from the CPU to the cooler.
**Comprehensive Cooling Guide:**
Read our [Understanding Computer Cooling Systems: A Complete Guide]
**Monitor Temperatures:**
Learn [6 Simple Ways to Monitor Your Computer’s GPU Temperature] Don’t forget high-quality thermal paste to ensure efficient heat transfer from the CPU to the cooler.
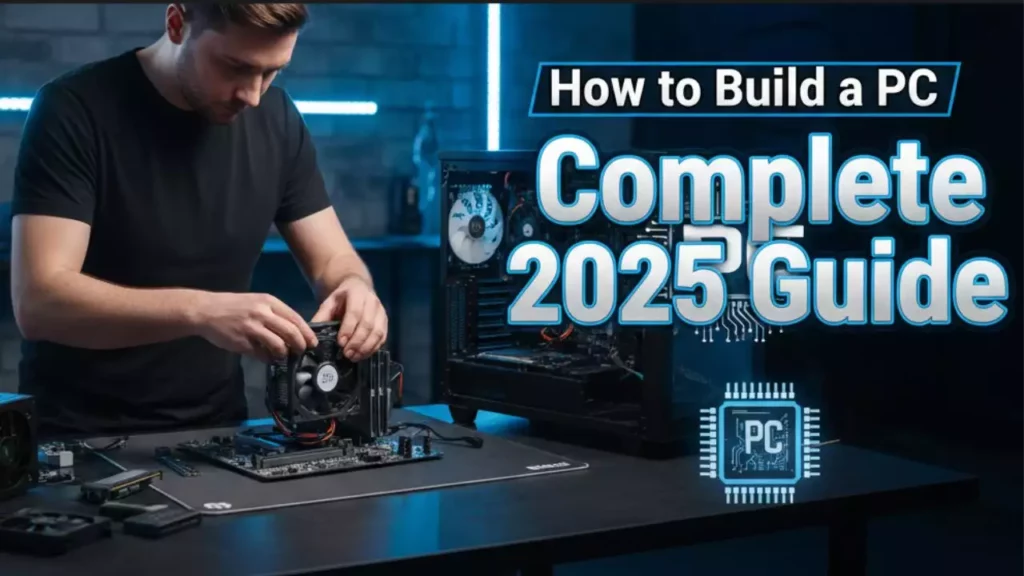
The Assembly Process: Step-by-Step Construction
With all your components in hand, the exciting part begins: assembly. This process, while seemingly intricate, is a logical sequence of steps. Patience, attention to detail, and a clear workspace are your best allies. Before you begin, ensure you have a clean, well-lit area, a Phillips head screwdriver, and ideally, anti-static measures like an anti-static wrist strap or by frequently touching a grounded metal object (like your unpainted PC case).
## Before Assembly: Installation Guides
**CPU Installation Help:**
– [How to Install Intel 12th, 13th, and 14th Gen CPUs]- Step-by-step visual guide
**Storage Installation:**
– [Guide to Installing a Second SSD in Your Computer]- Detailed walkthrough
1. Prepare the Motherboard:
Start by placing your Motherboard on its anti-static bag or a non-conductive surface. This is the easiest time to install the CPU, CPU cooler mounting brackets, and RAM.
CPU Installation: Open the CPU socket retention arm. Carefully align the CPU with the socket, paying close attention to the gold triangle or arrow on the CPU and the corresponding marker on the socket. Do not force it; the CPU should drop in effortlessly. Close the retention arm, which will secure the CPU in place.
CPU Cooler (Mounting Brackets): If your cooler requires a backplate, install it on the reverse side of the Motherboard now. Attach any necessary mounting brackets around the CPU socket as per your cooler’s instructions.
RAM Installation: Open the clips on the RAM slots. Align the RAM sticks with the slots, ensuring the notch on the RAM stick matches the notch in the slot. Press firmly and evenly on both ends of the RAM stick until the clips audibly snap into place. Refer to your Motherboard manual for the correct slots to use for dual-channel memory (typically slots 2 and 4, or A2 and B2).
2. Prepare the Case:
Lay your PC case on its side. Locate the Motherboard stand-offs and install them if they aren’t pre-installed. These are small screws that elevate the Motherboard to prevent it from shorting against the case. Ensure you only install stand-offs where there are corresponding screw holes on your Motherboard. Install the I/O Shield (the metal plate with cutouts for your Motherboard’s ports) into the back of the case from the inside, ensuring it clicks firmly into place.
3. Install the Motherboard:
Carefully lower the Motherboard into the case, aligning the screw holes on the Motherboard with the stand-offs. Ensure the I/O ports align perfectly with the I/O Shield. Screw the Motherboard into place, tightening gently.
4. Install the CPU Cooler:
Apply a small pea-sized dot or line of thermal paste to the center of your CPU‘s integrated heat spreader (IHS). Place the CPU cooler onto the CPU, aligning its mounting holes with the brackets you installed earlier. Secure the cooler according to its instructions (screws, clips, etc.). If it’s an AIO liquid cooler, mount the radiator and fans to the designated spots in your case (usually front, top, or rear) before securing the pump block to the CPU. Connect the CPU fan header or AIO pump header to the appropriate pins on the Motherboard.
5. Install Storage Drives:
NVMe SSDs: Locate the M.2 slots on your Motherboard. Remove the small retaining screw or latch. Gently slide the NVMe SSD into the slot at an angle until it’s fully seated. Press it down and secure it with the screw or latch. Many Motherboards include heatsinks for NVMe SSDs; install these over the SSD if applicable.
SATA SSDs/HDDs: Mount these drives into the designated drive bays or cages within your case. Secure them with screws or tool-less clips.
6. Install the GPU:
Locate the primary PCIe x16 slot on your Motherboard (usually the top-most, reinforced slot). Remove the corresponding PCIe slot cover from the back of your case. Open the retention clip at the end of the PCIe slot. Carefully align your GPU with the slot and press it down firmly until it clicks into place and the retention clip closes. Secure the GPU to the case with screws at the back.
7. Install the PSU:
Mount the PSU into its designated compartment in your case (usually at the bottom rear). Secure it with screws from the outside. If it’s a modular or semi-modular PSU, connect the necessary cables now before mounting, as it can be harder to access later.
8. Cable Management and Connections:
This is often the most time-consuming but crucial step for aesthetics and airflow.
Motherboard Power: Connect the large 24-pin ATX power connector to the Motherboard. Connect the 8-pin EPS (CPU power) connector (sometimes 4+4-pin or 8+4-pin) to the top-left or top-right of the Motherboard.
GPU Power: Connect the PCIe power cables (6-pin, 8-pin, or 12VHPWR) from the PSU to your GPU. Ensure all connectors are fully seated.
Storage Power & Data: Connect SATA power cables from the PSU to your SATA SSDs and HDDs. Connect SATA data cables from these drives to the SATA ports on your Motherboard.
Case Fans: Connect case fan power cables to the fan headers on your Motherboard.
Front Panel Connectors: This is often the trickiest part due to small, unlabeled pins. Connect the Power Switch, Reset Switch, HDD LED, Power LED, USB 2.0, USB 3.0, and HD Audio cables from the case to their respective headers on the Motherboard. Consult your Motherboard manual for precise pinout diagrams.
Route all cables neatly behind the Motherboard tray and through grommets in the case to keep the main compartment clear for optimal airflow and a clean look. Use zip ties or Velcro straps to secure cables.
Double-check all connections to ensure everything is firmly seated. This thoroughness will prevent many common first-boot issues.
First Boot and Software Setup
The moment of truth arrives after assembly: the first boot. This stage involves verifying hardware functionality, installing the operating system, and setting up essential software and drivers. Approach this with a methodical mindset, as it lays the groundwork for your PC’s performance and stability.
## BIOS/UEFI Updates
**Before you start:**
Understanding firmware is crucial:
– [What is BIOS: Basic Input Output System]
– [What is UEFI: Unified Extensible Firmware Interface]
**BIOS Update Guides:**
– [How to Update the BIOS on ASUS Motherboards]
– [Detailed Guide to Updating Gigabyte BIOS]
**Important:**
Read [Real Experience: I Updated My BIOS and Almost Lost My Motherboard] before attempting BIOS updates.
1. Initial Power-On and POST Check:
Before closing up your case, connect your monitor to the GPU’s DisplayPort or HDMI output, plug in your keyboard and mouse, and connect the power cable to the PSU and a wall outlet. Flip the PSU’s power switch to the ON position. Press your case’s power button.
What to Look For: Fans on the CPU cooler, GPU, and case should spin. You should see a display signal on your monitor, typically showing the Motherboard manufacturer’s logo or a BIOS message. Many Motherboards have POST (Power-On Self-Test) indicator LEDs or a small DEBUG display that can help identify issues if the system fails to boot. If you get a display, congratulations! Your basic hardware setup is functional.
Troubleshooting No POST/Display: If nothing happens or you get no display, immediately power off the system. Check all power connections (24-pin ATX, 8-pin EPS, PCIe power for GPU). Reseat RAM sticks. Ensure the GPU is fully seated in its PCIe slot. If your CPU has integrated graphics, try connecting your monitor to the Motherboard’s video output to rule out a GPU issue.
## Troubleshooting Common Issues
**No Display/Boot Issues:**
– [Troubleshooting Boot Issues: Upgrading from i7-2600K to i5-12600K]
– [Comprehensive Computer Beep Codes Help You Fix Errors]
**GPU Problems:**
– [GPU Fan Not Spinning]- Common causes and fixes
– [Top Reasons Why Your Graphics Card is Not Working]
**Driver Issues:**
– [How to Reset Graphics Drivers on Windows 11: A Complete Guide]
2. Accessing BIOS/UEFI:
As soon as the Motherboard logo appears, repeatedly press the designated key to enter the BIOS or UEFI setup (commonly Del, F2, F10, or F12). The BIOS (Basic Input/Output System) or its modern graphical equivalent, UEFI (Unified Extensible Firmware Interface), is your Motherboard’s firmware, where you can configure hardware settings.
Key Settings:
Boot Order: Ensure your USB drive (containing the OS installer) is prioritized in the boot order.
XMP/EXPO: Enable XMP (for Intel platforms) or EXPO (for AMD platforms) to allow your RAM to run at its advertised speed. Otherwise, it will default to a slower speed.
SATA Mode: Confirm SATA Mode is set to AHCI (or RAID if you’re setting up a RAID array).
Fan Curves: Adjust fan curves to optimize cooling and noise levels.
Secure Boot/TPM: For Windows 11, ensure Secure Boot and TPM 2.0 are enabled (typically under Security or Boot settings).
Save your changes and exit the BIOS/UEFI. Your system should now attempt to boot from your USB drive.
3. Operating System Installation:
You’ll need a bootable USB drive with your chosen operating system (most commonly Windows 10 or 11).
Creating a Bootable USB: Use the official media creation tool from Microsoft (for Windows) or a tool like Rufus (Rufus.ie) for other OSes to prepare your USB drive.
Installation Process: Follow the on-screen prompts. You’ll typically be asked to select your language, accept terms, choose a custom installation, and select the NVMe SSD you wish to install the OS on. The installer will partition and format the drive automatically. Once the installation is complete, the system will restart multiple times. Remove the USB drive when prompted or after the first restart to prevent it from booting back into the installer.
4. Driver Installation:
After the OS is installed, you’ll have a basic, functional system, but it won’t be optimized. Drivers are software that allows your OS to communicate effectively with your hardware.
Motherboard Chipset Drivers: Install these first. Download the latest chipset drivers from your Motherboard manufacturer’s website.
GPU Drivers: This is critical for gaming and graphics performance. Download the latest drivers directly from NVIDIA (GeForce Experience) or AMD (Adrenalin Software) for your specific GPU model.
Network Drivers: If your Ethernet or Wi-Fi isn’t working automatically, download and install the network drivers from your Motherboard manufacturer’s website. You might need to use another computer to download these onto a USB drive.
Audio Drivers: Install audio drivers from your Motherboard manufacturer for optimal sound quality.
Other Drivers: Check your Motherboard manufacturer’s website for any other specific drivers (e.g., USB 3.2, Bluetooth, NVMe controllers).
Perform all necessary Windows Updates after installing drivers.
5. Essential Software and Utilities:
Once drivers are installed, install essential software:
Web Browser: Chrome, Firefox, Edge.
Antivirus/Security Software: Windows Defender is integrated, but third-party options are available.
Monitoring Tools: Tools like HWMonitor or HWiNFO64 to monitor CPU/GPU temperatures and clock speeds.
Benchmarking Software: Optional, but useful for verifying performance (e.g., 3DMark, Cinebench).
Gaming Platforms: Steam, Epic Games Launcher, GOG Galaxy, etc.
Your PC is now fully operational! Take time to explore your new system, customize settings, and enjoy the fruits of your labor.
Optimization and Maintenance: Keeping Your PC Running Smoothly
Building your PC is just the first step; ongoing optimization and maintenance are crucial to ensure it runs at peak performance and remains reliable for years to come. In 2025, with components generating more heat and demanding more power, proactive care is more important than ever.
## Performance Optimization
**Windows Optimization:**
– [Optimize Windows for Faster Performance]- Complete tuning guide
**Troubleshooting Slowdowns:**
– [Why is My PC Slow? Uncovering the Root Causes of Lag]
– [Why Your Computer is Slowing Down]
**Storage Management:**
– [How to Safely Increase C Drive Space in Windows]
**When to Upgrade:**
– [5 Signs It’s Time to Upgrade Your Computer]
1. Performance Tuning and BIOS Settings:
BIOS/UEFI Optimization: Revisit your BIOS periodically. Manufacturers release firmware updates that can improve stability, performance, or add new features. Flashing your BIOS (BIOS update) should be done carefully, following the Motherboard manufacturer’s instructions.
XMP/EXPO Profile: Double-check that your RAM’s XMP (Extreme Memory Profile) or EXPO (Extended Profiles for Overclocking) profile is enabled in the BIOS to ensure your RAM runs at its advertised speed and timings.
Fan Curves: Fine-tune your fan curves in the BIOS or using Motherboard software. Balance cooling performance with noise levels. You want fans to ramp up under load and spin down when idle.
Overclocking (Advanced): For experienced users, overclocking your CPU or GPU can yield additional performance. However, this requires careful research, incremental adjustments, and thorough stability testing. Improper overclocking can lead to system instability or hardware damage. Always proceed with caution and adequate cooling.
Operating System Optimization: Regularly check Windows power settings (set to High Performance or Ultimate Performance), disable unnecessary startup programs, and keep your OS clean by uninstalling unused software.
2. Temperature Monitoring:
High temperatures are the enemy of PC longevity and performance. Regularly monitor your CPU and GPU temperatures, especially under load.
Monitoring Tools: Use software like HWMonitor, HWiNFO64, or utilities bundled with your GPU drivers (e.g., NVIDIA GeForce Experience, AMD Adrenalin Software) to track temperatures.
Safe Temperature Ranges: Generally, CPU temperatures under heavy load should ideally stay below 80-85°C, and GPU temperatures below 85-90°C. If you consistently see higher temperatures, investigate your cooling setup.
Improve Airflow: Ensure your case has a balanced fan configuration (e.g., intake fans at the front/bottom, exhaust fans at the top/rear). Clean dust filters regularly.
Thermal Paste: After a few years, thermal paste on your CPU cooler can dry out and become less effective. Reapplying fresh thermal paste can significantly improve CPU cooling performance.
3. Regular Cleaning:
Dust accumulation is inevitable and can severely impede cooling efficiency.
Dust Filters: Clean your case’s dust filters every 1-3 months, depending on your environment.
Internal Cleaning: Every 6-12 months, carefully open your case and use compressed air to blow out dust from CPU heatsinks, GPU fans, PSU intake, and case fans. Hold fans gently to prevent them from spinning too fast. Avoid using a vacuum cleaner inside your PC, as static discharge can damage components.
4. Software Updates:
Keeping your software up-to-date is crucial for security, performance, and bug fixes.
Operating System: Enable automatic updates for your OS (e.g., Windows Update).
Drivers: Regularly check for new GPU drivers from NVIDIA or AMD, as these often include performance optimizations for new games and applications. Update chipset and other Motherboard drivers periodically from your Motherboard manufacturer’s website.
Applications: Keep your essential software and games updated.
5. Backups and Data Protection:
Hardware can fail, and data loss can be devastating. Implement a robust backup strategy.
Regular Backups: Use external hard drives, NAS (Network Attached Storage), or cloud services (e.g., Google Drive, OneDrive, Dropbox) to back up important documents, photos, and projects.
System Restore Points: Create system restore points in your OS before making major changes or installing new software.
RAID (Optional): For critical data, consider setting up a RAID 1 array (mirroring) with two HDDs or SATA SSDs for redundancy, though this adds complexity.
6. Upgrading Components:
One of the key advantages of a custom PC is its modularity.
Identify Bottlenecks: Use monitoring tools and benchmarks to identify which component is limiting your system’s performance. Is your GPU struggling in games, or is your CPU maxing out during video renders?
Strategic Upgrades: You don’t need to replace everything at once. Upgrading your GPU typically yields the biggest performance boost for gaming. Adding more RAM or a faster NVMe SSD can improve multitasking and load times. A CPU upgrade might require a new Motherboard if you’re changing sockets.
* Compatibility Check: Always verify compatibility with your existing components, especially the PSU wattage, case size, and Motherboard socket/RAM type.
By diligently following these optimization and maintenance practices, your custom-built PC will continue to deliver excellent performance and reliability, serving you well through 2025 and beyond.
## Explore More PC Build Guides
Now that you understand the fundamentals, check out our curated build guides for different budgets and use cases:
### Budget Builds
– [Building a Budget 1080p Gaming PC]
– [Micro-ATX PC: RTX 3060 Ti + Ryzen 5 5500 Build Guide]
### Mid-Range Builds
– [$1350 Gaming PC]
– [Build: Ryzen 7 3700X + RX 9060 XT Gaming Rig]
– [Gaming mATX Build Ideal for Small Apartments]
### High-End Builds
– [Building a Gaming PC in 2025: RTX 5090 32GB + Ryzen 7 9800X3D]
– [High-End Gaming PC Build 2025]
– [Micro-ATX Beast: Ryzen 7 7800X3D and RX 9070 XT]
### Compact Builds
– [Mini-ITX Gaming PC Build 2026]
### Themed Builds
– [Evangelion PC Build: Intel Core i9-13900K + RTX 3090 24GB]
– [White Violet Ice Gaming PC Build]
– [White Out 1440p Powerhouse Build Guide]
### Specialized Builds
– [Building a PC for Robotics Research and Gaming]
– [How to Build Your Own eGPU for Your Laptop in 2025]
### Upgrade Guides
– [Upgrading to AMD Ryzen 5 7600X3D]
– [Evaluating a 2013 Gaming PC for 2025]
### Planning Tools
Compare PC part picker tools: [PCPartPicker vs Pangoly vs BuildMyPC]
Conclusion: Your Journey to PC Mastery
Embarking on the journey of building your own PC in 2025 is more than just assembling components; it’s an educational, empowering, and ultimately deeply satisfying endeavor. From the initial spark of an idea to the final click of the power button and the glow of your monitor, each step is a testament to your patience, research, and growing technical expertise. You’ve navigated the complexities of component compatibility, wrestled with intricate cable management, and triumphed over the occasional troubleshooting hurdle, emerging with a machine perfectly tailored to your ambitions.
The benefits extend far beyond the immediate satisfaction. You now possess a deep understanding of your computer’s inner workings, empowering you to diagnose issues, optimize performance, and confidently plan future upgrades. This knowledge transforms you from a passive user into an active participant in the technological world, giving you an edge in a landscape increasingly reliant on digital prowess. The cost-effectiveness and unparalleled customization of a self-built system mean you’ve invested wisely in a machine that not only meets your current needs but is also prepared for the evolving demands of tomorrow’s software and experiences.
As technology continues its relentless march forward, your custom PC stands as a testament to modularity and adaptability. The advancements we anticipate in 2025, from even more efficient CPUs and GPUs to further iterations of PCIe and RAM standards, mean that your journey into PC mastery is an ongoing one. The skills you’ve acquired will serve you well as you consider future component upgrades, perhaps even planning an entirely new build years down the line.
So, take a moment to appreciate the powerful machine you’ve brought to life. It’s not just a collection of silicon and circuits; it’s a reflection of your dedication, a tool for your creativity, and a gateway to countless hours of productivity and entertainment. Welcome to the world of PC builders , a community of innovators and enthusiasts who understand the true power of creating something from the ground up. Enjoy your custom-built PC of 2025; you’ve earned it.
Frequently Asked Questions
Is building a PC in 2025 still cheaper than buying pre-built?
Generally, yes. By selecting individual components and avoiding OEM markups and assembly costs, you can often achieve a better performance-to-price ratio with a custom build, especially for mid to high-end systems.
What’s the most important component for gaming in 2025?
For gaming, the GPU (Graphics Processing Unit) remains the single most critical component, directly impacting frame rates and graphical fidelity. Allocate the largest portion of your budget here for the best gaming experience.
Do I need DDR5 RAM for a new PC build in 2025?
For a new, future-proof build in 2025, DDR5 RAM is highly recommended as it’s the current standard supported by modern CPUs and Motherboards, offering higher speeds and bandwidth than DDR4.
How often should I clean my PC?
It’s recommended to clean your case’s dust filters every 1-3 months and perform a more thorough internal cleaning with compressed air every 6-12 months to prevent dust buildup and maintain optimal cooling.
What if my PC doesn’t turn on after building it?
First, double-check all power connections (24-pin ATX, 8-pin EPS, PCIe power for GPU). Reseat RAM sticks and the GPU. Consult your Motherboard manual for POST error codes or LED indicators that can pinpoint the issue.
Is it difficult to install an NVMe SSD?
No, installing an NVMe SSD is quite straightforward. It typically involves removing a small screw or latch on the Motherboard’s M.2 slot, sliding the SSD in, and then securing it.

Hi, I’m Nghia Vo: a computer hardware graduate, passionate PC hardware blogger, and entrepreneur with extensive hands-on experience building and upgrading computers for gaming, productivity, and business operations.
As the founder of Vonebuy.com, a verified ecommerce store under Vietnam’s Ministry of Industry and Trade, I combine my technical knowledge with real-world business applications to help users make confident decisions.
I specialize in no-nonsense guides on RAM overclocking, motherboard compatibility, SSD upgrades, and honest product reviews sharing everything I’ve tested and implemented for my customers and readers.