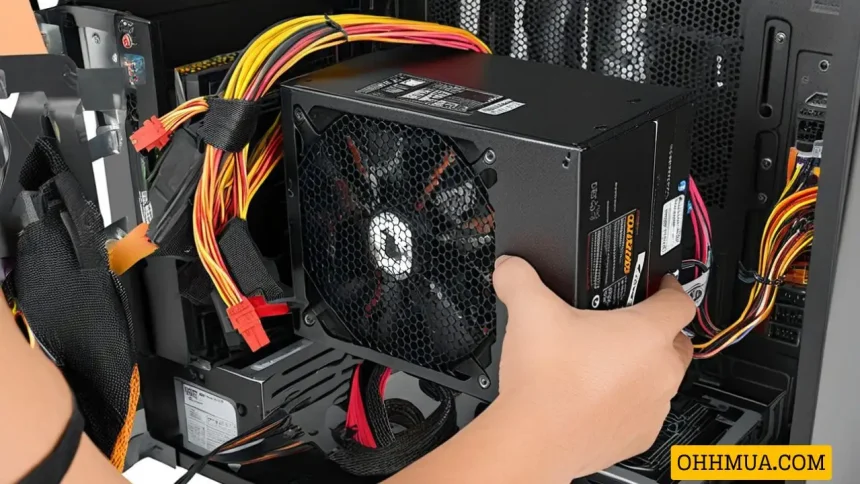
When your computer fails to start, it can be a frustrating experience that leaves you feeling helpless. One of the first components you should suspect is the power supply unit (PSU), as it is responsible for delivering power to all parts of the system. However, before you rush to replace it or call for professional help, you may want to assess whether the power supply is functioning properly. In this article, we will explore various ways to test your computer’s power supply, including straightforward methods that require minimal tools and knowledge.
Understanding the Role of the Power Supply in Your Computer
A computer’s power supply serves as the heart of the system, converting electrical energy from an outlet into usable power for all components. It supplies different voltages required by various devices—like the motherboard, CPU, hard drives, and more. Since the PSU plays such a critical role in powering your system, recognizing its importance can provide valuable insight into troubleshooting computer issues.
The most common symptoms of a failing power supply include random shutdowns, failure to boot, and unusual noises coming from the unit itself. Before diving into testing methods, it’s essential to understand some basic concepts about how power supplies work and what could potentially go wrong.
What Happens When a Power Supply Fails?
When a power supply fails, it can lead to several potential scenarios:
- Complete Failure: This is when the power supply does not turn on at all. You may find no lights indicating power on the motherboard, and fans remain silent.
- Intermittent Power Loss: The computer may start but suddenly shut down without warning, often due to overheating or damaged components within the power supply.
- Inadequate Power Distribution: Sometimes, the power supply may still work but not provide sufficient power to all components, leading to erratic behavior, crashes, or failed boot attempts.
Understanding these scenarios helps you identify whether your problem lies with the power supply or if other hardware components might be at fault.
Signs of a Faulty Power Supply
Recognizing signs of a faulty power supply can save you time and effort during troubleshooting:
- No Power or Boot Issues: If your computer doesn’t respond when pressing the power button, the power supply may be dead.
- Unusual Sounds: Buzzing, clicking, or grinding noises can indicate mechanical failure within the PSU.
- Overheating: Excessive heat can lead to premature failure. If your PSU feels unusually hot, it might not be operating efficiently.
By being aware of these indicators, you can better pinpoint the source of your computer issues and decide whether to pursue further diagnostics or replacement.
Safety Precautions Before Testing Your Power Supply
Before attempting any tests, safety should always come first. Electrical components can be dangerous if mishandled. Here are some guidelines to keep in mind:
- Avoid Opening the Power Supply Unit: Do not attempt to disassemble the power supply, as it contains capacitors that can store lethal amounts of electricity even after being unplugged.
- Use Insulated Tools: If you must use tools to connect wires, ensure they have insulated handles to prevent accidental shocks.
- Work in a Static-Free Environment: Use an anti-static wrist strap or work on a non-static surface to avoid damaging components with static electricity.
Keeping these precautions in mind ensures a safer and more effective troubleshooting process.
Basic Testing Methods for Your Power Supply
There are several methods to check if your power supply is functional. These range from simple techniques that anyone can do to more advanced methods that may require additional tools.
Visual Inspection of the Power Supply Unit
One of the simplest ways to determine if your power supply is working is through visual inspection:
- Check Connections: Ensure that all cables are securely connected to the motherboard and other components. Loose connections can often mimic power supply failure.
- Look for Damage: Inspect the exterior of the PSU for any visible signs of damage, such as burn marks, bulging capacitors, or frayed wires.
- Listen for Sounds: When the computer is powered on, listen carefully for any operational sounds coming from the PSU. A lack of sound can signify failure.
Performing a thorough visual examination can quickly reveal whether the power supply has suffered any physical damage that might cause it to malfunction.
Using a Multimeter to Test Voltage Outputs
If your initial inspections don’t yield clear results, using a multimeter can provide more definitive answers regarding the power supply’s functionality:
- Set Up the Multimeter: Connect the black lead of the multimeter to the ground wire (usually a black wire) and the red lead to the specific voltage pin you wish to test (e.g., +12V, +5V).
- Power On the Unit: Once connected, plug in the power supply and switch it on. Carefully read the voltage readings displayed on the multimeter.
- Compare Readings: Compare your readings with standard voltage levels; +12V, +5V, and +3.3V should typically be present depending on the pin you are testing.
Using a multimeter allows for precise measurement of output voltages, helping diagnose whether the PSU is failing to deliver adequate power.
Testing with Paperclip Method: A DIY Approach
For those who prefer hands-on methods, the paperclip technique can serve as a practical way to test your PSU without complex equipment. This method is popular among DIY enthusiasts for its simplicity.
Preparing for the Paperclip Test
Before you start, gather the necessary materials:
- A paperclip or a small piece of wire
- Screwdriver to remove the PSU connectors
- A safe workspace free from clutter
Performing the Paperclip Test
To execute the paperclip method, follow these steps:
- Disconnect the Power Supply: Unplug the PSU from the wall socket and ensure that it is completely disconnected from all components.
- Identify the 24-Pin Connector: Locate the 24-pin ATX connector that connects to the motherboard. This is usually the largest connector.
- Bend the Paperclip: Shape the paperclip into a U-shape. You will connect pin 15 (black wire) and either pin 16 (green wire) or pin 17 (another green wire).
- Insert the Paperclip: Insert one end of the paperclip into pin 15 and the other end into pin 16 or 17. This creates a short circuit, allowing the power supply to turn on independently.
- Power On the Supply: Plug the PSU back into the wall outlet and switch it on. Observe if the fan spins. If there is no movement, the PSU likely requires replacement.

This method harnesses the internal mechanism of the power supply to bypass the motherboard, making it a quick way to check functionality.
Interpreting the Results
After completing the paperclip test, what happens next can indicate the condition of your power supply:
- Fan Spins: If the fan starts spinning, the power supply is likely operational, and the issue may lie elsewhere in your computer.
- No Response: If you see no fan activity, it is probable that the PSU is defective and may need to be repaired or replaced.
Utilizing the paperclip method can offer immediate insights into your power supply’s status without needing specialized tools.
Advanced Testing: Power Supply Tester
For a more comprehensive evaluation, investing in a dedicated power supply tester can be beneficial. These testers are designed specifically to analyze power supply performance and can provide detailed feedback.
Features of a Power Supply Tester
A quality power supply tester generally includes several advantages:
- Multiple Voltage Displays: It displays various voltage outputs simultaneously, allowing you to see if each individual output meets standard specifications.
- Error Indicators: Many testers feature LED indicators that light up if voltages fall outside safe operating ranges, simplifying the troubleshooting process.
- Ease of Use: Most power supply testers are designed to be user-friendly, providing quick results without requiring extensive technical knowledge.
How to Use a Power Supply Tester
Using a power supply tester is straightforward:
- Connect the Tester: Plug the 24-pin connector from the power supply into the tester.
- Power On the Supply: Switch on the power supply and observe the results on the tester’s display.
- Interpret the Results: Look for green indicator lights next to the voltage readings to confirm proper operation. If any lights are red or off, the corresponding voltage output is likely faulty.
This method offers a more thorough analysis of your power supply’s health, enabling you to make informed decisions.
Additional Troubleshooting Steps Beyond the Power Supply
If your power supply tests indicate that it is functioning correctly, it may be time to investigate other components of your computer. There are several potential issues to consider:
Checking Other Hardware Components
Sometimes hardware failures occur in tandem, mimicking power supply failure:
- Motherboard Issues: A faulty motherboard can inhibit power delivery to components. Inspect for burns, bulges, or other signs of damage.
- Memory Problems: Bad RAM can also result in boot failures. Consider reseating memory modules or running diagnostic tools to check their integrity.
- Peripheral Devices: External devices can sometimes cause boot loops or failures. Disconnect peripherals and try booting the system again.
By examining these elements, you can narrow down the culprit behind your computer’s failure to start.
Software-related Issues
While less common, software problems can also lead to symptoms resembling power supply failure:
- Corrupted Operating System: If software corruption occurs, your computer may fail to boot. Try accessing recovery options or reinstalling the operating system if possible.
- Malware: Malicious software can interfere with normal operations. Running a thorough scan can help identify and eliminate any threats.
Considering these aspects can provide clarity on whether the issue lies within the power supply or elsewhere in your system.
Conclusion
Checking a computer’s power supply is crucial for effective troubleshooting when facing startup issues. Through careful inspection, DIY methods like the paperclip test, or employing a power supply tester, users can ascertain the functionality of their power supply. Remember, safety should always be your top priority when dealing with electrical components.
Whether you’re a seasoned technician or a novice computer user, understanding how to evaluate your power supply empowers you to address issues confidently. Should the power supply prove faulty, taking appropriate action—whether repair or replacement—will restore your system’s functionality and get you back to computing smoothly.

Hi, I’m Nghia Vo: a computer hardware graduate, passionate PC hardware blogger, and entrepreneur with extensive hands-on experience building and upgrading computers for gaming, productivity, and business operations.
As the founder of Vonebuy.com, a verified ecommerce store under Vietnam’s Ministry of Industry and Trade, I combine my technical knowledge with real-world business applications to help users make confident decisions.
I specialize in no-nonsense guides on RAM overclocking, motherboard compatibility, SSD upgrades, and honest product reviews sharing everything I’ve tested and implemented for my customers and readers.


