In 2025, the demand for high-performance graphics on laptops continues to surge, driven by gaming, video editing, 3D modeling, and other graphics-intensive tasks. While laptops with dedicated GPUs are available, they often come with a premium price and reduced portability. An external GPU (eGPU) offers a compelling solution, allowing you to connect a powerful desktop graphics card to your laptop, combining portability with desktop-level performance. Building your own eGPU can be a cost-effective and rewarding DIY project, potentially saving you hundreds of dollars compared to pre-built enclosures. This comprehensive guide walks you through the process of building an eGPU in 2025, leveraging the latest Thunderbolt 5 technology for optimal performance.
Why Build Your Own eGPU?
An eGPU transforms your laptop into a powerhouse for graphics-intensive tasks without requiring a full system upgrade. Here are some key benefits:
-
Cost-Effectiveness: A DIY eGPU setup can cost around $430, including the GPU and PSU, compared to commercial enclosures starting at $300 without a GPU.
-
Flexibility: You can choose components tailored to your needs and upgrade them as technology advances.
-
Portability: Maintain your laptop’s portability for travel while enjoying enhanced performance when plugged into the eGPU at home.
-
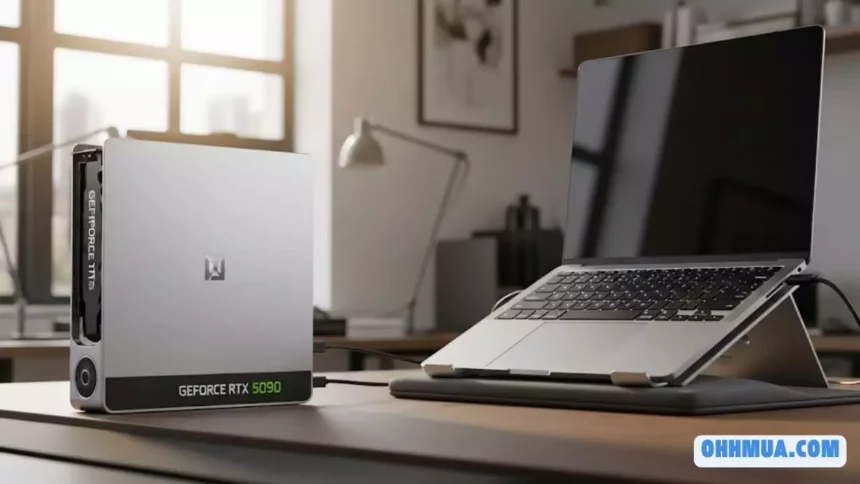
Performance Boost: Desktop GPUs, like the NVIDIA RTX 50 series, offer superior performance for gaming, creative work, and high-resolution displays.
Research suggests that eGPUs are becoming more viable in 2025, thanks to advancements like Thunderbolt 5, which offers up to 80Gbps (or 120Gbps in some cases) of bandwidth, reducing performance bottlenecks compared to Thunderbolt 3’s 40Gbps limit (PCWorld, 2025). However, compatibility issues and setup complexity can be hurdles, so it’s crucial to verify your laptop’s specifications and choose compatible components.
Components You Need

To build your own eGPU, you’ll need the following components, updated for 2025 technology:
|
Component |
Description |
Example |
|---|---|---|
|
GPU |
A desktop graphics card suited to your needs and budget. In 2025, NVIDIA’s RTX 50 series (e.g., RTX 5070 or RTX 5080) offers excellent performance for gaming and creative tasks. Ensure compatibility with your enclosure and PSU. |
NVIDIA GeForce RTX 5070 or RTX 5080 (NVIDIA, 2025) |
|
Power Supply Unit (PSU) |
A PSU with sufficient wattage to power your GPU. High-end GPUs like the RTX 5080 require at least 650W. Ensure it has the necessary power connectors (e.g., 8-pin or 12VHPWR). |
Seasonic Focus 650W or higher (Seasonic) |
|
eGPU Enclosure |
A Thunderbolt 5 enclosure for optimal bandwidth. Thunderbolt 5 supports up to 80Gbps, reducing performance bottlenecks. |
Sparkle Studio-G 850 or ASUS ROG XG Mobile 2025 (Sparkle, ASUS) |
|
Thunderbolt Cable |
A Thunderbolt 5 cable to maximize bandwidth and ensure stable data transfer and power delivery. |
Thunderbolt 5 cable (included with most enclosures or purchased separately) |
|
Software |
Thunderbolt Control Center to manage connections and the latest GPU drivers from NVIDIA or AMD. |
Thunderbolt Control Center (Microsoft Store), NVIDIA/AMD drivers (NVIDIA, AMD) |
Notes on Component Selection
-
GPU: The NVIDIA RTX 50 series, launched in January 2025, features the Blackwell architecture with advanced AI-driven rendering and DLSS 4, making it ideal for eGPU setups. The RTX 5070 or RTX 5080 balances performance and cost, but you can use older GPUs like the RTX 40 series if budget is a concern.
-
PSU: Ensure the PSU supports your GPU’s power requirements. For example, the RTX 5080 may require a 12VHPWR connector, common in 2025 high-end GPUs.
-
Enclosure: Thunderbolt 5 enclosures like the Sparkle Studio-G 850 support desktop GPUs and offer additional ports like USB-A and Ethernet, enhancing connectivity. If Thunderbolt 5 is unavailable, Thunderbolt 3 or 4 enclosures are still viable but offer lower bandwidth.
-
Compatibility: Verify that your laptop has a Thunderbolt 5 (or 3/4) port and supports eGPUs via BIOS or software. Some laptops, especially those with Apple Silicon, may have limited eGPU support.
Step-by-Step eGPU Assembly Guide
Setting up an eGPU sounds complex, but you’ll find it much simpler than expected. You won’t need to struggle with complicated software or hidden settings. Just assemble the parts and install drivers.
Step 1: Prepare the eGPU Dock
Start by preparing the eGPU dock. Attach the mounting bracket that will securely hold both the graphics card and power supply. This bracket ensures nothing moves around when you power up the system.

Step 2: Mount the Power Supply
After attaching the bracket, secure the power supply. Position the PSU so the fan faces outward, ensuring the GPU doesn’t block airflow once the eGPU is fully assembled.
Step 3: Install the Graphics Card

Lift the graphics card and gently slide it into the PCIe slot on the dock. Once the card is aligned and fully seated, screw it tightly to the bracket to keep it secure.
Step 4: Connect Power Cables

Connect all power cables properly:
- Connect the 24-pin (motherboard) cable to the dock
- Add the 4+4 pin (CPU) cable for peripheral charging
- Connect both 8-pin and 6+2 PCIe connectors to the GPU
- Double-check that all connections are secure
Step 5: Install Thunderbolt Software
Switch to your laptop and download the Thunderbolt Control Center from Microsoft Store. This application helps your computer recognize and manage all Thunderbolt devices, making eGPU connection seamless.
Step 6: Connect eGPU to Laptop
Take the Thunderbolt cable and connect the eGPU to your laptop. Ensure you connect to your laptop’s Thunderbolt port (the one with the Thunderbolt logo) rather than a regular USB-C port. eGPUs require the Thunderbolt protocol, which isn’t available in all USB-C interface cables.
Step 7: Configure Thunderbolt Connection

Open Thunderbolt Control Center. Your new eGPU should appear almost immediately. If it doesn’t connect automatically, click Connect and set the option to “Always connect.” This way, you won’t need to approve the connection every time you plug in the dock.
Step 8: Install GPU Drivers

Visit NVIDIA or AMD’s website to download the latest drivers for your graphics card. Install them and look for the GPU control panel icon in your system tray. If you see that icon, you’re done. You can also install GPU-Z to verify everything is working with your eGPU.
DIY eGPU vs Commercial Solutions: Which Is Better?
Building your own eGPU offers several advantages over commercial solutions:
Cost Savings: DIY builds cost significantly less than pre-built enclosures Flexibility: Choose your own components based on specific needs Upgradability: Easy to swap GPUs when newer models release Learning Experience: Gain valuable tech knowledge through hands-on building
Common eGPU Troubleshooting Tips
Connection Issues: Always use certified Thunderbolt cables and ensure proper port identification Power Problems: Verify all power connections are secure and PSU capacity matches GPU requirements Driver Conflicts: Clean install GPU drivers and disable integrated graphics when using external display Performance Bottlenecks: Connect monitors directly to eGPU outputs for maximum performance
Is Building a DIY eGPU Worth It in 2025?
Building your own eGPU is one of the most satisfying DIY tech projects you can complete. It solves graphics performance issues without forcing you to sacrifice portability or spend money on a new laptop. This setup gives you flexibility to handle intensive graphics tasks when needed while maintaining portability for travel.
The entire process takes about 20 to 30 minutes, with most time spent on hardware assembly. The software setup is quick and automatic. Once you’ve installed the drivers, you’re ready to enjoy your upgraded setup.
Conclusion: Transform Your Laptop with DIY eGPU
A DIY eGPU build transforms any compatible laptop into a desktop-class gaming and creative workstation. With the right components and this step-by-step guide, you can create a powerful external graphics solution that costs less than commercial alternatives while offering superior flexibility and performance.
Whether you’re a gamer, content creator, or professional who needs occasional graphics power, a DIY eGPU provides the perfect balance of performance, portability, and value. Start your build today and experience the satisfaction of creating your own custom external graphics solution.
FAQ
1. What is an eGPU?
An eGPU (external Graphics Processing Unit) is a desktop-style graphics card connected externally to a laptop to improve graphics performance.
2. Why should I build an eGPU for my laptop?
Building an eGPU allows you to upgrade your laptop’s graphics power without replacing the whole machine, perfect for gaming, video editing, and 3D rendering.
3. What do I need to build an eGPU setup?
You’ll need a compatible graphics card, a PCIe riser or adapter (like M.2 or mini PCIe), a power supply (PSU), and optionally an enclosure.
4. Can any laptop support an eGPU?
No, only laptops with Thunderbolt 3/4 ports or internal access to PCIe slots (like M.2 NGFF) can support eGPUs.
5. Is Thunderbolt required to use an eGPU?
Not necessarily. Thunderbolt makes setup easier, but DIY methods using M.2 or mini PCIe are cheaper and commonly used.
6. Will my laptop recognize the eGPU automatically?
Sometimes yes, but often you’ll need to adjust BIOS settings, disable internal GPU, or install specific drivers or bootloaders.
7. How much does it cost to build an eGPU setup?
Depending on your parts, it can range from $100 (budget DIY) to $500+ (using official Thunderbolt enclosures).
8. Is gaming performance significantly improved with an eGPU?
Yes. An eGPU provides a huge FPS boost and makes your laptop capable of running modern AAA games smoothly.
9. Can I close my laptop lid when using the eGPU?
You can, but for best cooling and performance, using an external monitor and keyboard is recommended.
10. Do I need special software to run an eGPU?
In most cases, only GPU drivers are needed. Older laptops may require tools like eGPU Setup 1.35 or tweaks via DDU + BIOS.

Hi, I’m Nghia Vo: a computer hardware graduate, passionate PC hardware blogger, and entrepreneur with extensive hands-on experience building and upgrading computers for gaming, productivity, and business operations.
As the founder of Vonebuy.com, a verified ecommerce store under Vietnam’s Ministry of Industry and Trade, I combine my technical knowledge with real-world business applications to help users make confident decisions.
I specialize in no-nonsense guides on RAM overclocking, motherboard compatibility, SSD upgrades, and honest product reviews sharing everything I’ve tested and implemented for my customers and readers.